
Restoration process
How to Restore Multiple Cast Iron Skillets Efficiently: My Batch Restoration Method
Several skillets can share the work without sharing the same timetable. Here is how I keep cleaning, rust treatment, inspection, and seasoning rounds from becoming one very confusing pile of iron.
By Kerri Rundstrom · Rundstrom Restorations · 8 min read
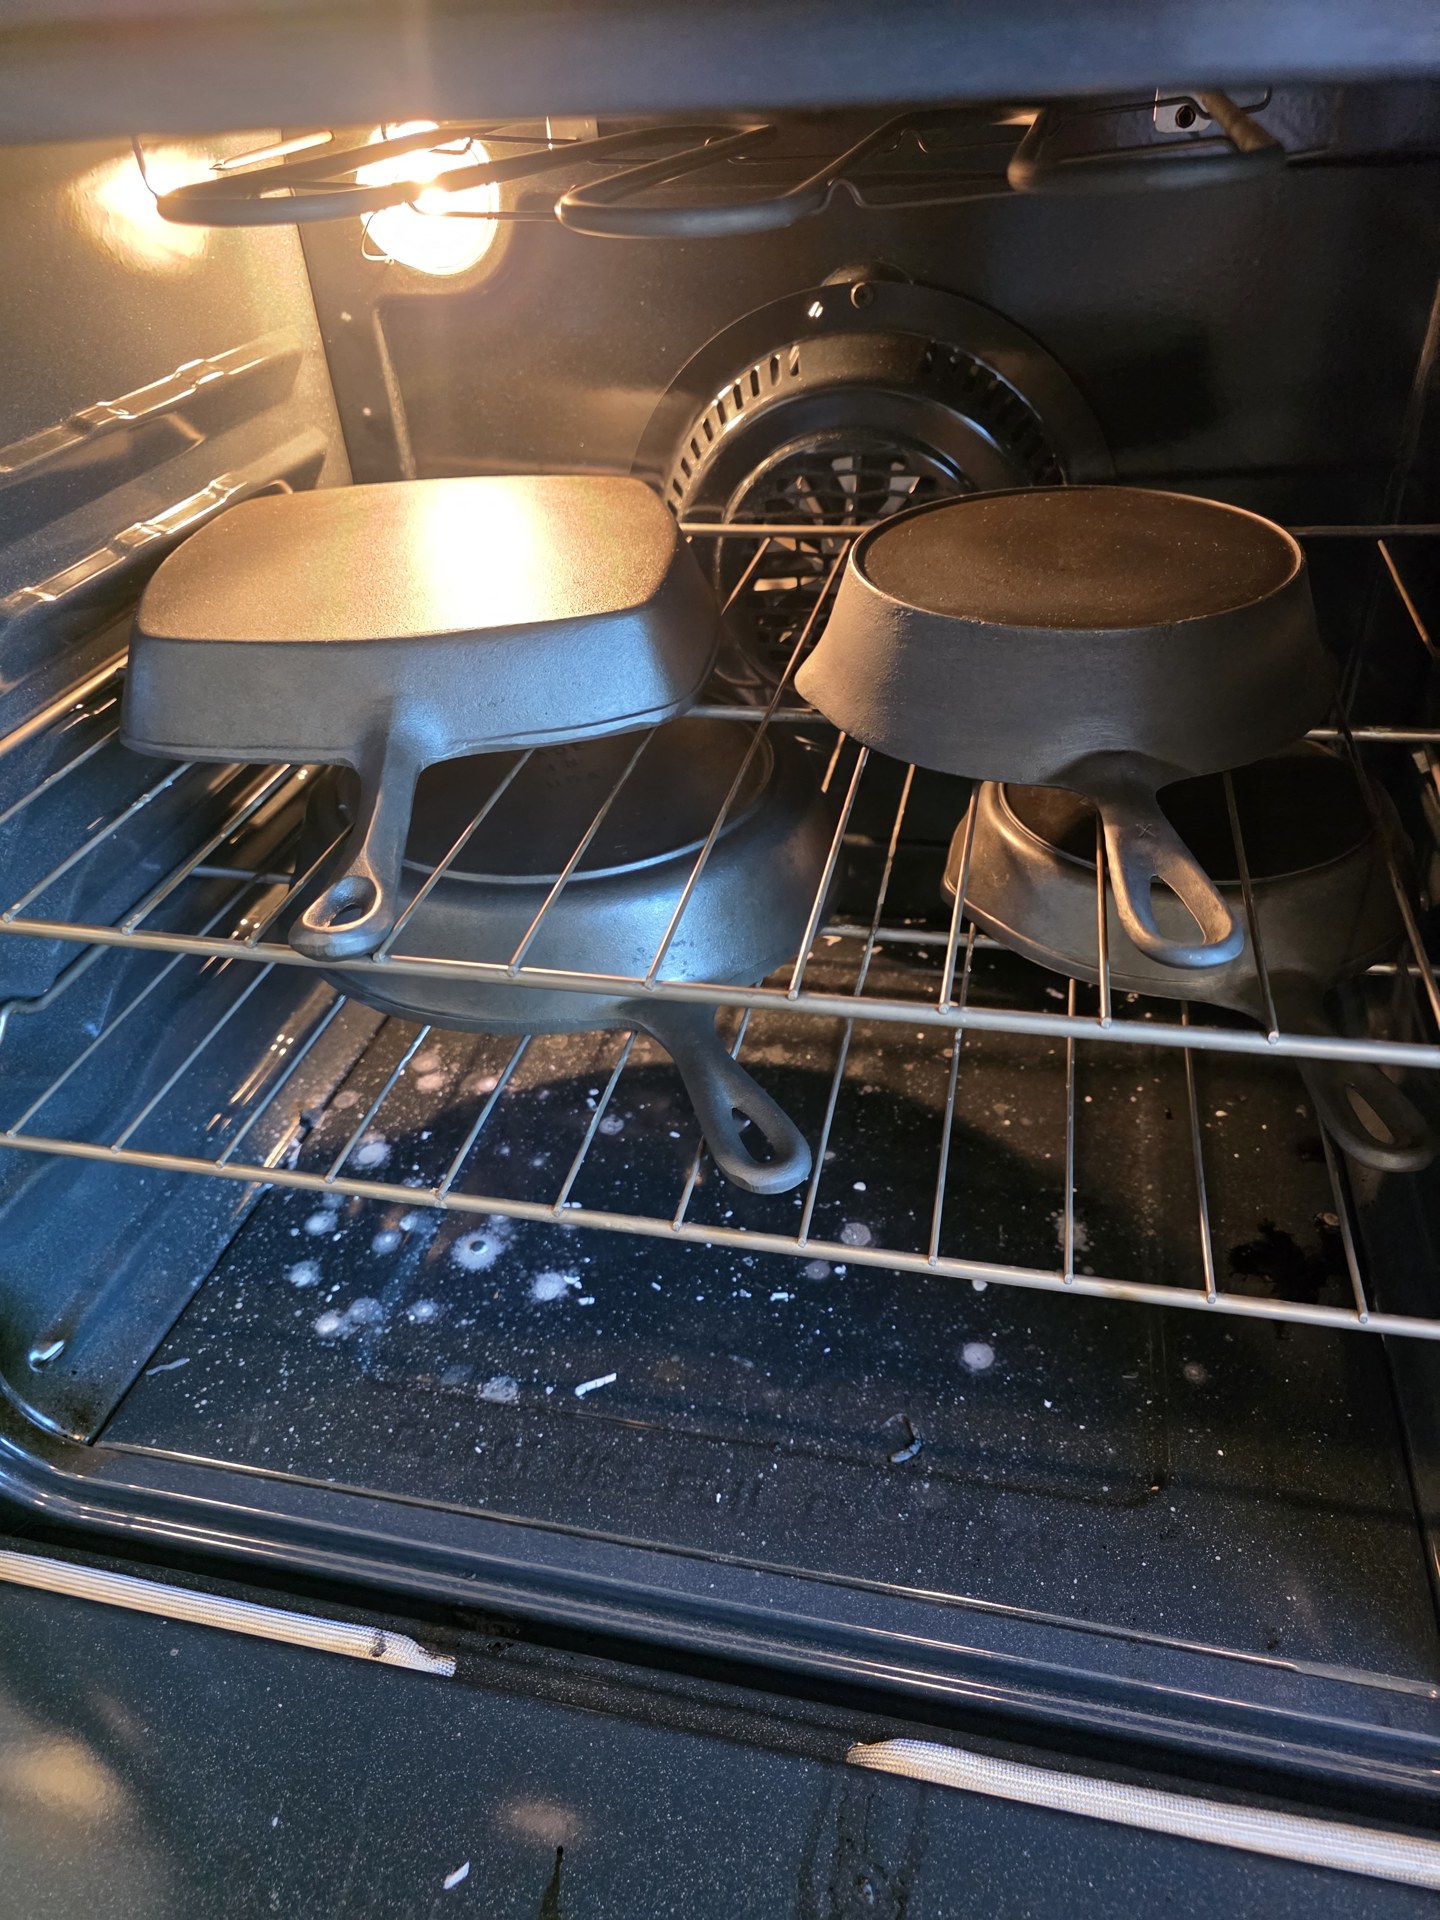
Batch the work, but keep track of each skillet
Restoring several old skillets at once sounds efficient until one is ready for seasoning, one still has buildup around the handle, and another has decided to grow orange spots again. Suddenly, the batch has opinions.
My batch restoration method is to group pieces by the work they need next. I can share a cleaning session or an oven round while still making decisions about each pan individually. Being in the same group does not mean they started together, need identical treatment, or will finish together.
The useful sequence is assessment, appropriate deposit removal, rust treatment where needed, washing and inspection, then seasoning. There are checks between those stages. A skillet that needs more attention goes back for that attention rather than moving forward because the others are ready.
1. Sort by condition before choosing a treatment
First I want to know what is actually on the iron. Thick old buildup and rust are different problems, and a pan can have both. The square skillet I have featured elsewhere had heavy carbon buildup, not rust. That distinction matters before choosing the next step. My carbon buildup versus rust guide shows the difference using its original photographs.
I also look at construction and condition. A plain cast-iron skillet, an enameled piece, and a kettle with other materials are not automatically candidates for the same bath. Uncertain coatings, plating, repairs, cracks, or an unknown use history deserve individual assessment.
For organization, a recognizable description is often more useful than another loose tag: Martin No. 5, the pitted No. 5, square skillet. A front-and-back photograph helps when pieces look alike. Keep the description attached to the piece's next step, especially if it is an heirloom or customer-owned pan. Two No. 5 skillets do not become interchangeable because the number matches.
2. Let the buildup-removal stage do its job
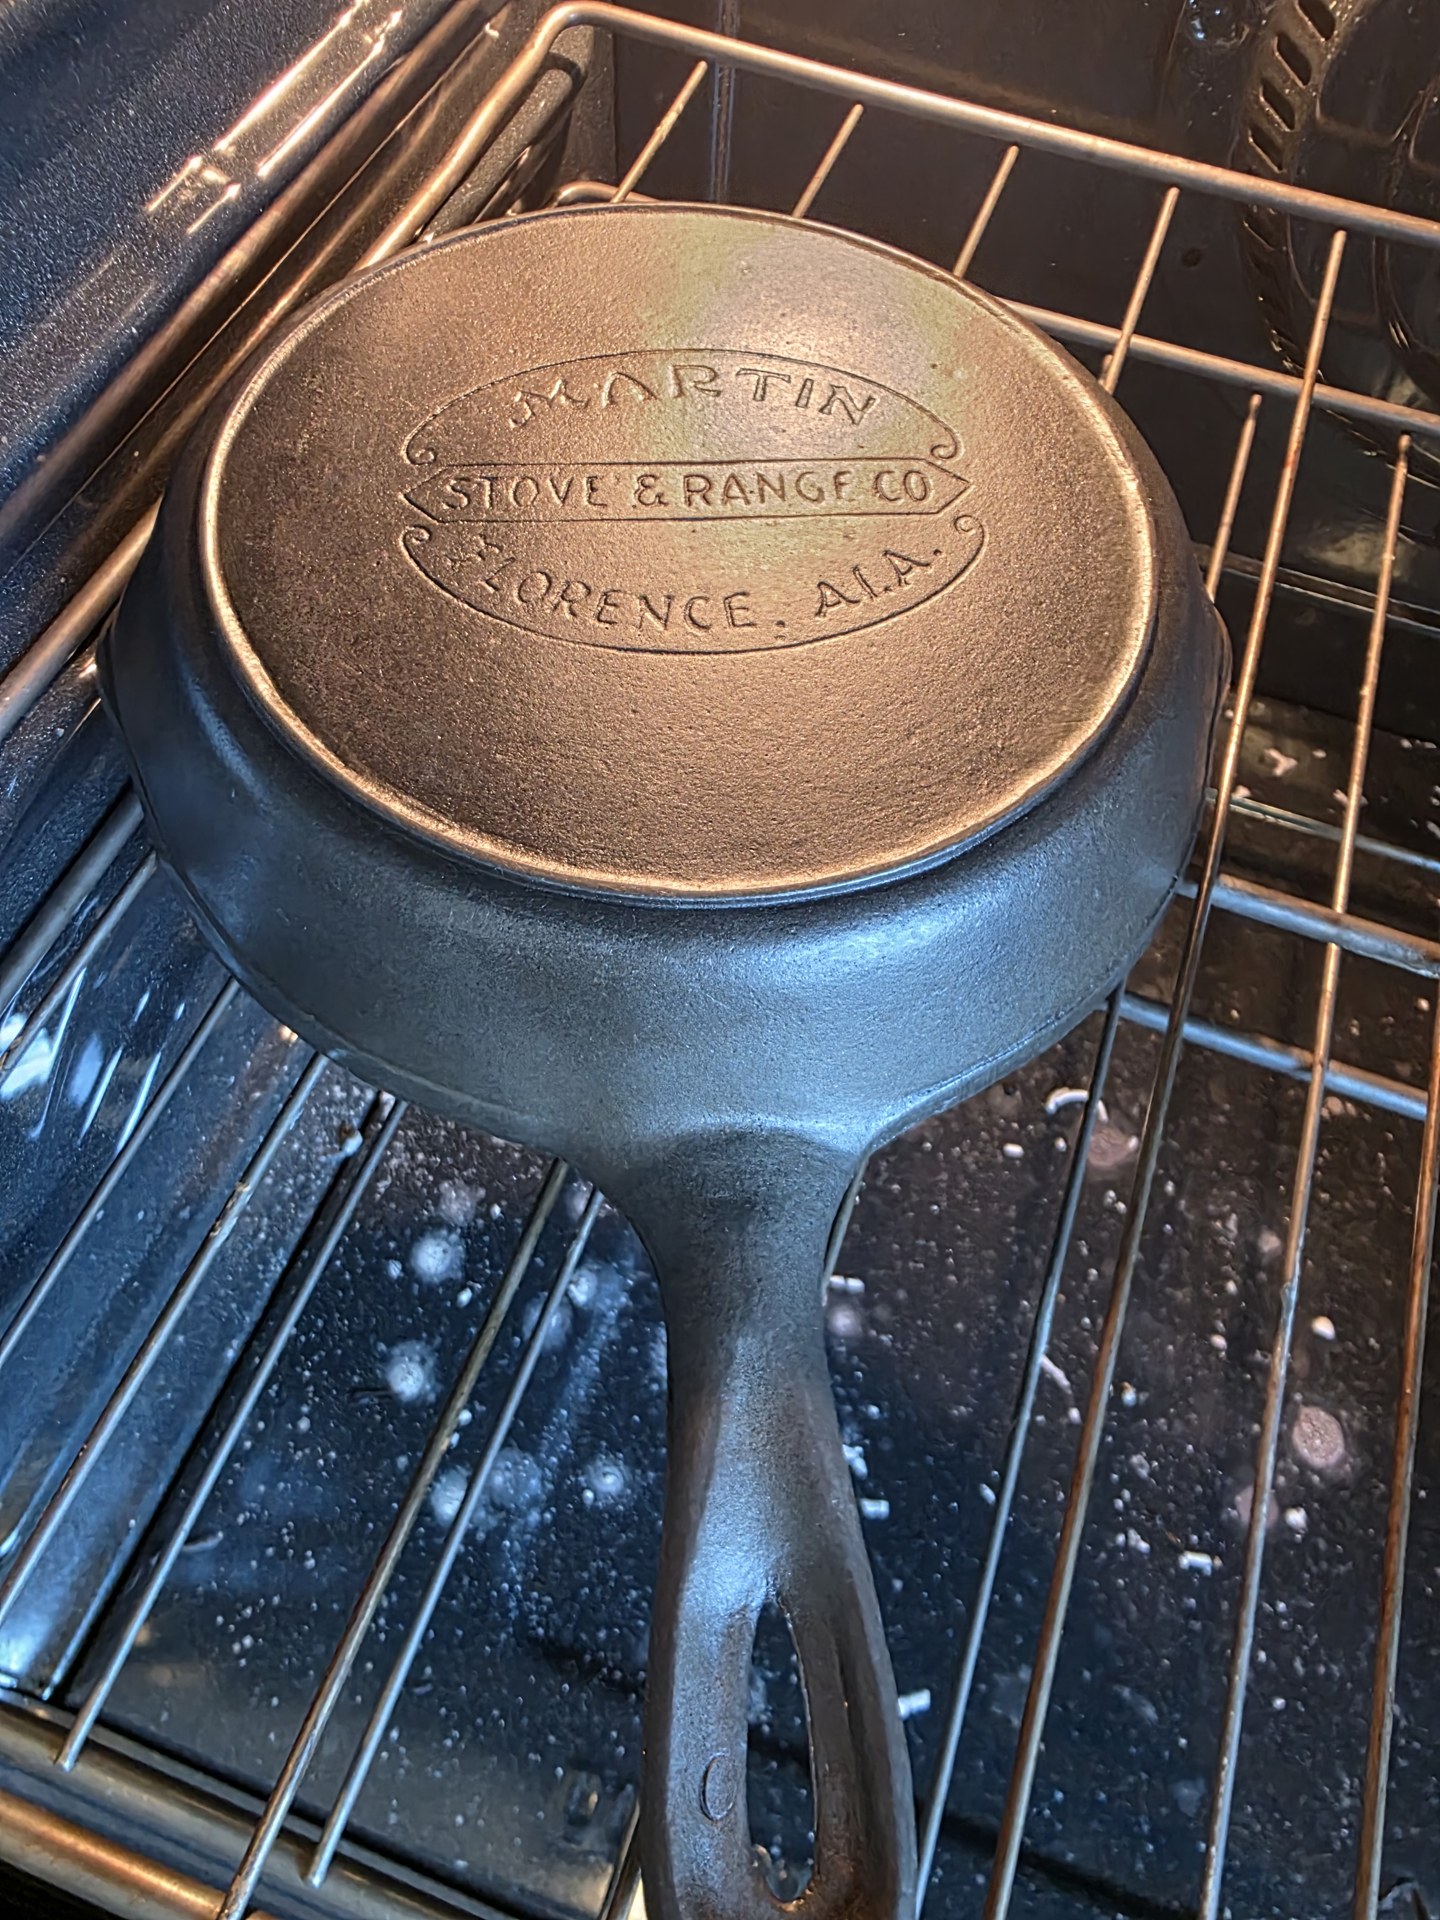
Lye-based stripping is useful for old grease and seasoning. It does not remove rust. In my workshop footage from November 11, I took two No. 5 skillets out of the lye holding bath: a Martin Stove & Range skillet and a separate, pitted No. 5. They shared that session, but each still needed its own surface check.
I look at the whole piece, including the underside, rim, handle junction, and any tight details. If deposits remain, the question is what they are and what treatment is appropriate. More force is not automatically the answer. I do not grind antique or heirloom iron smooth to make it look as though it passed through a factory yesterday.
The efficiency comes from grouping compatible work. It does not come from promising that every pan will be clean after the same number of hours. A heavily coated skillet can hold up its own progress without holding up every other piece.
3. Give rust treatment and tank maintenance their own place
When a piece needs rust treatment, that is a separate decision from stripping old organic buildup. Electrolysis is one of the methods I use. I keep the treatment stage distinct from the clean-and-ready-for-seasoning stage so that an unfinished piece does not get swept into the next oven group.
The tank also takes work. My November 17 footage shows accumulated deposits and anode cleaning with the power supply completely unplugged and all connections disconnected. Maintenance belongs in the workflow, not just the satisfying pan reveal. If equipment needs attention, I make room for that before planning the next load.
This is a description of my workflow, not a chemical mixing or electrical setup tutorial. For lye work, follow the product label and safety data sheet, use suitable chemical-resistant gloves and eye protection, and prevent splashes and skin contact. Keep labeled treatment containers secured away from children and pets. Do not mix treatment chemicals or transfer bath liquids between systems. Electrolysis needs ventilation, separation from ignition sources, and power unplugged before handling the piece, bath, or connections.
4. Wash, dry, and inspect before adding seasoning
Removing deposits gives me a better view of the casting. It is time to check again for remaining buildup, rust, cracks, and other condition concerns. A stubborn rough patch may be pitting rather than dirt. Cleaning cannot replace metal that is already missing.
The transition to seasoning includes thorough washing and rinsing after treatment, complete drying, and another look at the surface. If rust shows up again, that piece needs reassessment and corrective treatment. Covering the color with oil is not a substitute for dealing with the problem.
The photograph below is the Martin No. 5 in my oven later on November 11, after the bath-removal footage from that day. It is a useful connection between two documented stages. It does not tell us the exact seasoning-round count at the moment the photograph was taken.
5. Count seasoning rounds, not just oven loads
A pan that has been through the oven once and a pan that has completed its planned seasoning rounds can both look dark in a photograph. That is why the round count matters more than guessing from color. Bare iron and seasoned iron also look different, and lighting complicates the comparison.
In the group of ten pieces I photographed on November 16, five had completed three out of three planned seasoning rounds. The other five had completed only the first of three. The group included different shapes and sizes. It was one photo session, not one uniform completion stage.
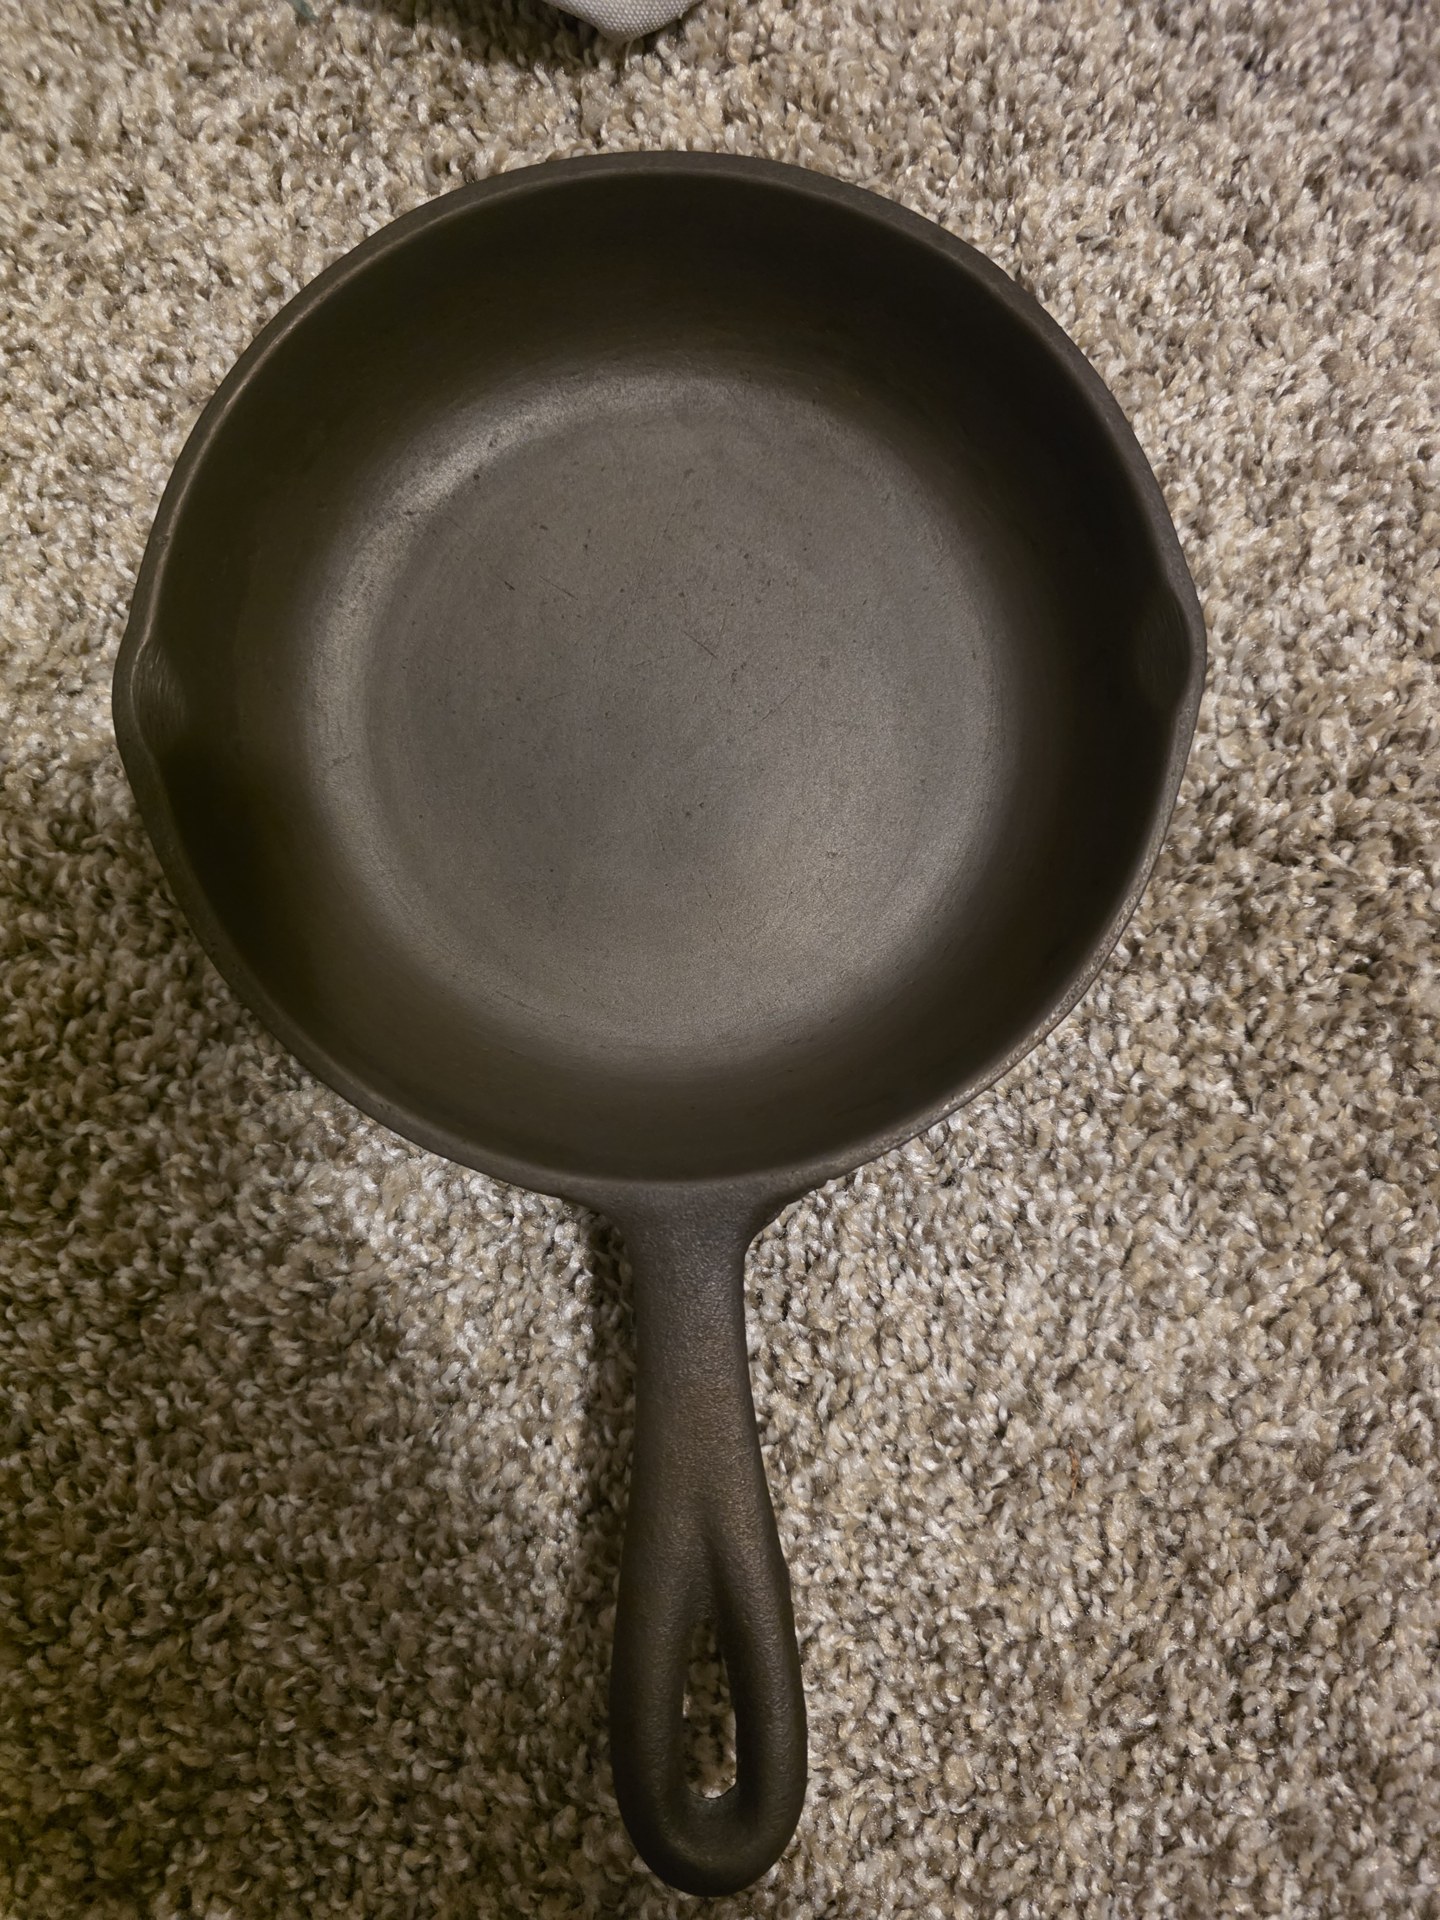
The Martin No. 5 pictured below belonged to the three-round group. The separate No. 3 shown in the next section belonged to the first-round group. These are different skillets, not before-and-after photographs of one pan.
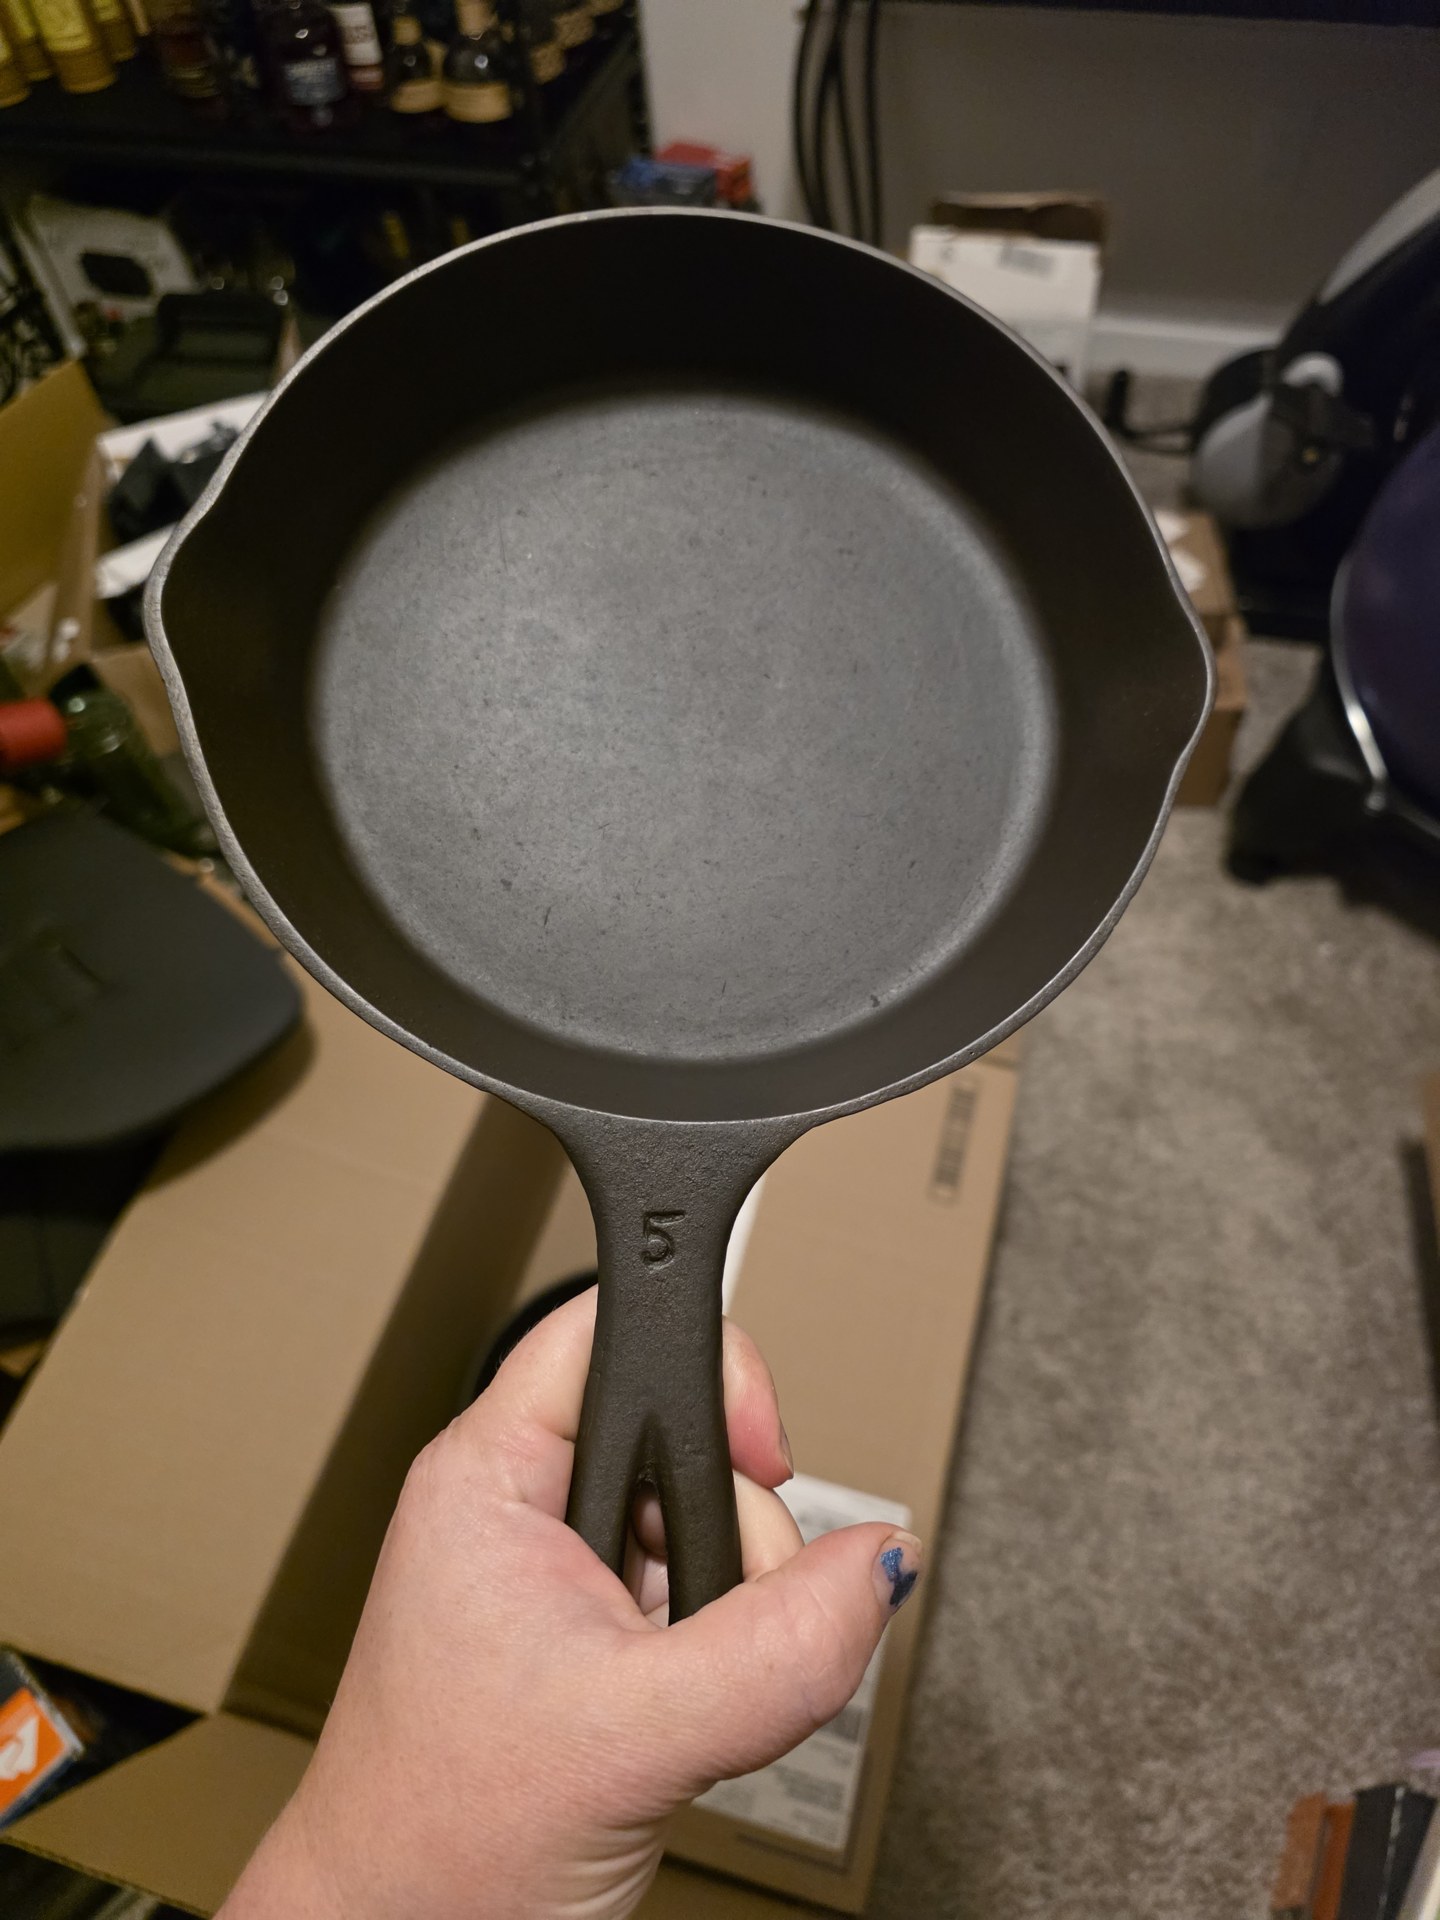
For the next oven session, I would keep each piece's completed-round count with it. A simple note such as '1 of 3 completed; next is round 2' is clearer than 'seasoning.' The count changes after the round is completed, not when I apply the next coat.
Thin, even oil coverage and complete drying matter; a heavy wet coat is not a shortcut to several seasoning layers. Lodge's seasoning instructions, linked below, explain the basic oil-and-heat process. My three-round count describes this documented workshop batch. It is not a universal requirement for every pan or every restoration.
6. Make the next step obvious
This is the organization I want when several pieces are moving at once: a clear description, the stage actually completed, and the next action. It can be a short note alongside a reference photograph. The point is to avoid relying on a mental picture of which small skillet was which.
For someone setting up a batch, these are useful groupings. Keep notes away from hot surfaces and chemical containers, and keep clean, dry pieces separate from work still awaiting treatment.
- Assessment pending: material, condition, and history still need a decision.
- Buildup removal or rust treatment: note which treatment the piece actually needs.
- Ready for washing and inspection: deposits removed, but the exposed iron still needs checking.
- Seasoning in progress: record completed rounds and the next round separately.
- Planned rounds completed: keep the final condition assessment distinct from the seasoning count.
7. Leave room for the piece that needs to go backward
An efficient batch needs an exception lane. My November 11 Wagner 1891-series No. 10 footage documented rust at the edges after its second seasoning round and corrective vinegar treatment. That was a problem being addressed, not a finished restoration reveal. It would be misleading to move it into the completed group because the other pans were farther along.
The same restraint applies to incoming specialty pieces. The molds, cornstick pan, and oval griddle in my November 18 intake photographs were before examples awaiting work. They help plan the next batch; they do not supply evidence that treatment or seasoning has already happened.
I cannot promise a fixed restoration time from the number of pans alone. What I can do is keep compatible tasks together, use oven space sensibly without crowding or unstable stacking, and let each piece pass its own checks. That is where batch restoration becomes useful instead of merely becoming a larger pile.
Have several old skillets waiting for attention?
Start with photographs of each piece's cooking surface, underside, handle, and any condition concerns. Knowing what is there makes it easier to decide what can share a treatment stage and what needs a separate plan.
If you would rather hand over the restoration work, send me your photographs and request a restoration assessment. You can also read about our preservation-focused process. A dark finish, a round count, or a good photograph cannot establish food safety or resolve an unknown history. The aim is honest assessment and appropriate work for the actual iron in front of us.
Sources and further reading
Over to you
What part of this story reminded you of your own cast iron, and what would you like us to explore next? Tell us in the comments below.
From the workshop
Before you strip that skillet…
Get our free Cast-Iron Rescue Checklist: what to inspect, which problems need treatment, and when to stop before the pan pays for your enthusiasm. Sign up below for an immediate PDF download and future workshop updates. Email delivery is not active yet.
Join the conversation
Questions, comments, questionable skillets?
Ask a question or tell us what you're working on. Comments are reviewed before appearing. Please leave personal contact details out.
Loading comments…